How to Make Your Own Compost
There are two good reasons to make your own compost:
- It reduces landfill waste.
- It creates a healthy and natural fertilizer product that you can add to flower gardens, vegetable plots, landscaping beds, lawns, and even container gardens and potted plants.
If you garden — whether successfully or not — you should learn how to make your own compost. If you believe you lack a green thumb or if your plants struggle to thrive, I especially encourage you to learn how to compost. Adding homemade compost to your garden can make a big difference. When I visited a botanical garden recently, a display talked about how the best soil amendment gardeners can add to their gardens is compost. Just good old basic organic matter. Whether your soil is heavy clay or sandy (most soils are one of these two types), compost is the most helpful thing you can add to attain a balanced and ideal growing medium. The good news is that every home produces all the ingredients necessary to make compost, and the process is easier and simpler than you might expect.
Even if you don’t have a garden, you can still sprinkle finished compost on top of your lawn (this is called topdressing) or around the base of trees to add nutrients.
What is compost?
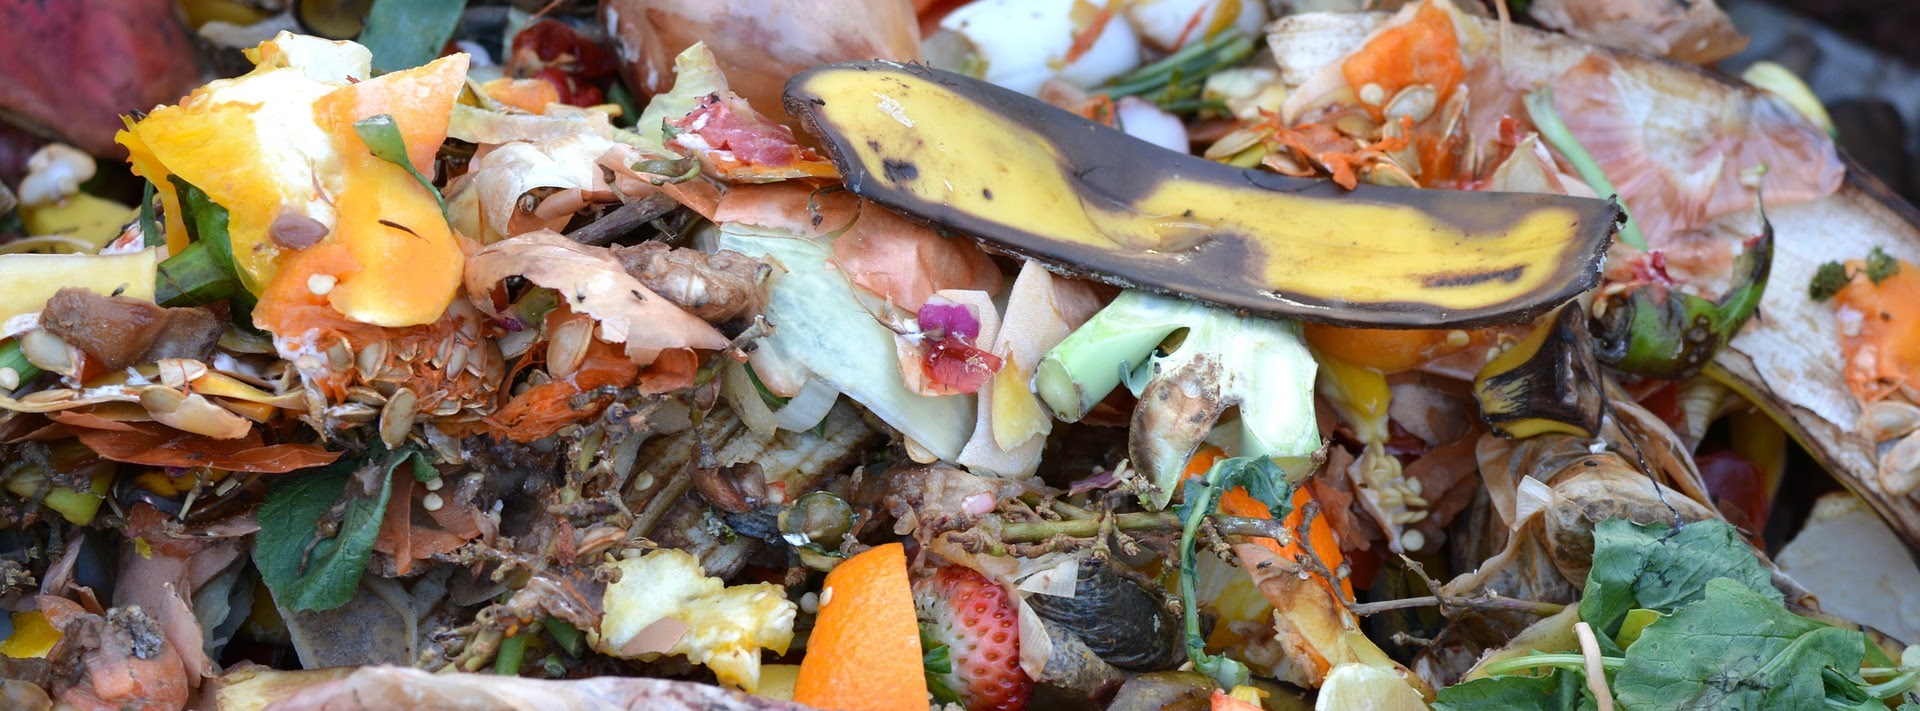
Compost is organic matter that decomposes to form a fertilizer or growing medium. It consists of items such as fruit and veggie scraps and peels, leaves, grass clippings, and even paper products. Mix these items with a bit of water and allow them a few weeks or months of time to decay, and you’ll get compost.
First, find a place to build a compost pile.
I’ve tried several methods:
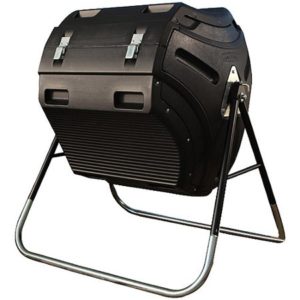
- The compost tumbler. This is a specially made plastic barrel that closes and rests on a stand, and it easily turns to mix up the materials inside. Mixing and turning the materials helps to speed up breakdown. Tumblers are among the easiest devices to use when making compost because all you have to do is turn them to mix the materials. The main downside is that tumblers tend to be expensive, and based on my own experience and from talking with other people who have made compost for years, tumblers tend to eventually break, especially as they get full, with the bin falling off the axle. My tumbler, which was given to me secondhand, broke after I had it for about a year. Also, water got into crevices around the lid of my compost tumbler and prevented me from opening the lid during freezing weather, so I had to resort to using a different method for part of the year.
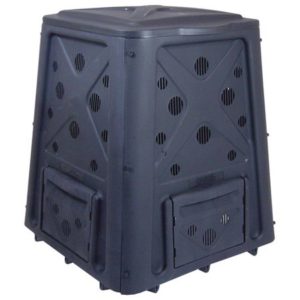
- The non-tumbling bin. Bins that do not tumble also are available to purchase, and they usually cost less than a tumbler. My main compost bin currently is a non-tumbling Earth Machine, and it’s one of my favorite methods because it’s easy and low-tech, and because the bottom of the bin is in contact with the ground all kinds of beneficial bugs can get into the compost to help break it down faster. You add the fresh materials into the top of the bin, and a door at the bottom opens to allow access to finished compost. It takes a little more effort to mix and rotate compost this way, but I purchased a Garden Weasel Garden Claw from my local hardware store, and it works well for aerating and turning the materials inside the bin. Similar to the tumbling bins, I have difficulty prying the lid off my Earth Machine bin when temperatures are below freezing and water has frozen in the crevices, so I keep a low-tech garbage can compost bin (see below) handy during the winter months so I can still collect compost materials.
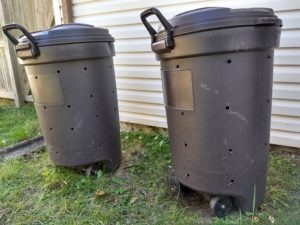
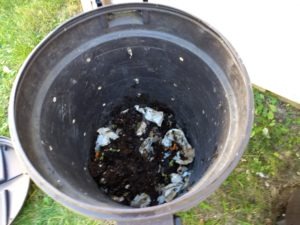
- The plastic garbage can. If you are on a budget, you can build your own bin by drilling holes in a plastic garbage can that has a lid. Fill the garbage can with composting material, close the garbage can tightly (you can secure it with bungee cord, if necessary), and then roll it around your yard to mix the materials inside. Watch to make sure the lid doesn’t pop off, but it’s not a big deal if it does come off and some compost spills. Just shovel it back inside the garbage can. My husband helped me make two of these garbage can bins a few years ago, and they work okay. It is sometimes harder to mix the compost this way compared to a commercially purchased tumbler, and sometimes I just dump the materials onto the ground and shovel them back in to really mix them. Some people like to place their garbage can compost bins on some bricks to get them off the ground and promote drainage. I prefer to place mine directly on the ground so that worms and other beneficial bugs can get into the bins to help break things down. You can’t beat this garbage can compost bin method in terms of cost savings, and it does produce a good finished compost. It’s also sometimes the only bin I can get open during the winter months when the lids freeze shut on my tumbler and Earth Machine bins.
- The basic pile on the ground. You also can build a pile directly on the ground in a corner of your yard. Some people fence their compost pile in with hardware cloth or some other type of metal wire garden fence, or some people build a simple untreated wood structure that is open on one side and open on the top. This pile method is best if you are only composting grass clippings and non-food items. If you put food scraps like veggie peels and fruit cores in it, it will likely attract animals such as rodents and raccoons who will view the pile as a food source. I live in the suburbs of a major metropolitan area, and we have rats, mice, squirrels, raccoons, and possums in the neighborhood who will gladly take advantage of a free feast, so I don’t leave my compost in a pile out in the open.
And before we move on, here’s a tip: If you don’t want to run outside to your compost bin every time you have an apple core or two (especially if you live in a climate that has cold winters), you may want to keep a container for compost ingredients on your kitchen counter or hidden in a cabinet. You can empty that smaller container into your main pile once a day or so. I keep a decorative cookie jar on my counter. One of my friends keeps a small covered trash can specifically labelled for compost next to her regular kitchen trash can. Some people just use a clean plastic gallon-sized ice cream bucket. Do what works for you.
Second, begin adding materials to your compost bin.
- Kitchen Scraps. These include all unwanted or unused fruits and vegetables such as potato and cucumber and carrot peels, strawberry stems, carrot tops and peels, broccoli and cauliflower stems, trimmed ends of asparagus, apple cores, peach and nectarine and plum pits, cherry seeds and stems, citrus peels, melon rinds, grape stems, banana peels, and the veggies your kids didn’t eat during dinner time (as long as they aren’t covered in cheese, butter, or salad dressing … more on that later). Tea bags (remove any staples), coffee grounds, egg shells, and grass clippings are also good. These items are all considered “green” materials, meaning they are fresh and wet and full of nitrogen.
- “Brown” materials. Fruits and veggies make up the bulk of your “green” materials in your compost, but you also need other ingredients for successful compost. Brown materials are dry and carbon-based, and they include paper products (old receipts, scrap paper, and even lightly used paper towels and Kleenex), cardboard (including egg cartons, toilet paper tubes, and paper towel tubes), dryer lint, coffee filters, scraps of yarn and thread, and dry leaves. I’m a fan of tossing receipts or old papers with financial or other personal information on them into the compost pile; they will easily decompose, and no one is likely to dig through my compost pile because of the gross and slimy factor, so I don’t have to worry about shredding these papers to protect against identity theft. At a minimum, you want at least half of your compost to be made of brown materials, with some experts recommending as much as 75% of your compost be composed of brown matter. I personally don’t keep track of the ratios. I just add whatever I’ve got and it usually works out. If your compost pile smells bad, though, that is one sign that you should add more brown materials.
- Water. You need to add water periodically to keep your pile moist but not sopping. It should feel like a wrung-out sponge. So place your bin within reach of a hose or watering can.
What not to include in your compost:
Do not put meat, fat, oil, grease, or dairy products in your compost bin. It will get smelly and nasty and be more likely to attract nuisance animals. Don’t put sticks, balls from sweet gum trees, or other large woody items in your bin either because these will take a long time to break down. Also, don’t put pet waste in your bin.
Now what?
It takes a few weeks to a few months for your materials to break down into finished compost that is ready to be spread in your growing beds. You can speed up the process by turning or mixing your compost about once a week. Turning adds oxygen to the mix and allows microorganisms to break down material. I tend to be lazy and don’t turn my compost that often. It all eventually breaks down, so don’t worry if you neglect your bin. Turning only speeds up the decaying process, but that process is not dependent on you turning the compost. Organic matter always breaks down in nature whether you help it along or not.
It’s not required, but I recommend keeping two separate compost bins so that the materials in one bin can fully break down, while you continue to add new materials to the other bin. If you’re always adding new ingredients to the same bin, the contents will never fully decompose. Also, once you get into the habit of composting, one bin may not be enough, depending on the size of your household.
Also, you can start your compost bin during any time of year, but just know that the decomposition process will happen more slowly during the winter months if you live in a region that gets below freezing.
It’s okay if you see beetles, worms, and other bugs in your compost pile. These guys are helping to break materials down. If you see undesirable creatures such as mice or cockroaches in your compost, it’s a sign that you need to turn it more frequently and perhaps add more water, as this will make it an inhospitable environment for them.
When the compost no longer looks like the original ingredients — when everything basically looks like moist mud or dirt — you can spread the finished compost on your garden beds, scoop it into flower pots, or add it wherever the soil needs a boost. Work it into the soil if you want or leave it on top and add some mulch. If you’re planting new things, add a hearty scoop of finished compost to the bottom of the hole before setting your plant in it. Finished compost makes a great filler if you’re starting new raised garden beds as well. I know a family that “made their own dirt” for their raised beds by making compost. They did not buy a single bag of garden soil from a nursery. It was very satisfying and cost-effective for them.
Making your own compost is like getting free fertilizer without any unsafe chemicals or unknown additives. Your plants will love it. You also get the benefit of keeping a decent amount of waste out of landfills. What’s not to like about any of that? Good luck!
Do you make your own compost? Let us know in the comments.